Page 1 of 6 12345 ... LastLast
Results 1 to 20 of 109

Thread: Kyle's H20/Mako mermiads inspired tail with a splash of personality!!!

  1. #1
    Senior Member Pod of Oceania Trident True's Avatar
    Join Date
    Apr 2013
    Location
    QLD Australia
    Posts
    382

    Kyle's H20/Mako mermiads inspired tail with a splash of personality!!!

    Update 23/2/2014
    ATTENTION: this thread will no longer be updated as this tail never came to be. there were too many problems and i never had all the knowledge I needed in order to create and finish this tail. feel free to look through the thread to see how i went about things.. if you have any Q's feel free to PM me. I haven't given up completely on the extended tail, once i obtain and figure out how to go about it.. I will attempt again.

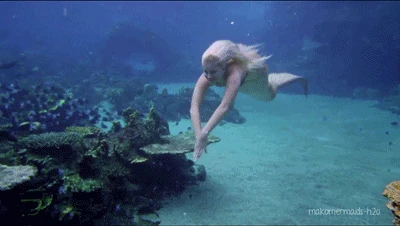
    Ok 3rd times the charm. ive tired twice now to upload this and it doesn't do it. SO i thought it was about time i got in on the action and started to show off the project im working on. I started designing my tail of oct 2012 and offically started my manequin of my legs late November, I knew what i wanted and i had a rough idea on how to get there but i serioulsy didnt think there were going to be this many obstacles along the way. These obstacles have made me MAD, have made me rip my hair out and made me cry, however if I hadn't had these things to go though i probably wouldn't appreciate what ive learnt now not to mention what i have produced. I have been lurking on the forum for some time now but i really didn't follow anyones tutorials as i thought i had it all worked out, and usally once ive got an idea in my head or once ive made up my mind there is no changing it. you could say i can be stubbon at times but i personally have to go with the flow. Im not going to sit here and say that i havent made mistates as i have i wasted 600AUD on trying to get things right. do I regret it. Yes. but i suppose that's the way i learn, yes i make myself learn the hard way and there are so many members here that do it the EASY way. what am I? a sucker for punishment thats what. Now i decided to go with H20/mako Mermaids tail inspired desing but with a splash of personality the only thing im really copying is the layout of the tail and the asethetics. my fins are my desing the flpper has a touch of my personality. But lets not get too overly excited. Im not using Dragons skin as it will not be directly on the skin and its far too expensive here is AUS. So i do ask each and every one of you please do not stated i should be using dragons skin. I am aware of the risks if any. the silicone im using is the mold max 27T and has extreamly similiar characteristics to dragons skin, have alook at the msds sheet. now all this aside lets begin.

    things i wanted when creating
    easy to get in and out off
    slimline, tight on the body
    covers my boney knees and hides my ankles
    looks realistic as possible with a splash of fantasy


    My beautiful body Obviously this is what I will be using to create the suit and build it on.


    prototype of flipper mold


    experimenting with macopearl tint


    now the creation of the flipper, I used poster cardboard to create my template, cut it out covered it in clear contact so the clay doesnt stick then started crafting. the pic below shows 10 hrs of work.


    the flipper took me 1 month to do as i do work full time and all of the detail was only done during daylight hours due to inpropper lighting. the flipper took about 30hrs to complete there is deff alot of work involved.


    Complete flipper ready for casting. I done the barrier the HARD way. the clay sits underneath the flipper, Instead of my me just laying it flat on the table.


    covered in plaster, works great by the way brings out all the detail and is affordable.


    what it looks like turned over after the plaster set. having the cardboard backing really helps with the extraction from the mold.


    ta-da the mold has got silcone in it as I was testing to see how deep it was, turns out it wasn't deep enough and i had to make alternations.


    moving on to the fins. one for left and right, casted the same way as above.


    fins casted,


    close up


    more images to come later. im actaully alot more along than in the pics im actually up to putting it all together.
    here is my neoprene suit i was playing around with my fins


    in this pic you pretty much see the final product of the flipper, it has been siliconed together then once it cured the sides were seamed. I used silicone out of the tub first to cover the seam then used a thicker silicone by mixing it up leaving out for 2hrs then leaving in freezer over night. NB doing this will allow the silicone to get very thick as when it cools to room temp it will start to cure.


    in currently working on my scales.
    Last edited by Trident True; 09-04-2016 at 05:15 AM.

    Can someone please get me back to the ocean before I suffocate... I need the water......


  2. #2
    Wow this looks incredible! Can't wait to see it painted!

  3. #3

    Kyle's H20/Mako mermiads inspired tail with a splash of personality!!!

    Pretty darn awesome!


    Sent from my iPhone using Tapatalk

  4. #4
    Senior Member Undisclosed Pod PearlieMae's Avatar
    Join Date
    Jul 2013
    Posts
    6,661
    Follow PearlieMae On Twitter Add PearlieMae on Facebook
    That's wonderful!

    I know what you mean by being stubborn, but I've learned to observe others' processes and glean information and adapt and adjust...it really saves some hair pulling and tears!

    Can't wait to see more!

    PS: your avatar freaks me out!

  5. #5
    THIS IS AMAZING! You should post videos of your progress! Very identical to their tails!

    Merman Typhoon!

  6. #6
    This is awesome!! Cant wait to see more!

  7. #7

    Re: Kyle's H20/Mako mermiads inspired tail with a splash of personality!!!

    this looks really close to the h2o tails. I can't wait to see how out turns out.

    Sent from my SPH-D700 using Tapatalk 2
    ~Mermaid Sashika of Yupalean~

  8. #8
    Senior Member Pod of Cali Ashton's Avatar
    Join Date
    Jul 2013
    Location
    Southern California, Dallas Tx
    Posts
    1,525
    Add Ashton on Facebook Add Ashton on Google+
    Follow Ashton on Tumblr Visit Ashton's Youtube Channel
    Looking good so far! I cant wait to see how to paint it!

  9. #9
    The detail on the fluke is just incredible! Everything is just so perfectly even! I'm in awe I can't wait to see more!

  10. #10
    Senior Member Pod of Cali Prince Calypso's Avatar
    Join Date
    Jul 2011
    Location
    Bakersfield California. USA
    Posts
    817
    Gah I hate you! JK lol
    But i am totes jealous at your progress and how well everything is coming out
    It looks great
    Hopefully I'll be able to start on my tail soon
    Cant wait to see more of your progress
    Little Sailor, Little fool, your better heed the golden rule
    do unto other just as you, would like to to have them do to you
    you think you can just walk away,but no, it doesn't work that way
    see once your mine, your'll always be
    I never give anything for free...

  11. #11
    Senior Member Pod of Oceania Trident True's Avatar
    Join Date
    Apr 2013
    Location
    QLD Australia
    Posts
    382
    Thanks everyone for the lovely words. Ive got some more photos to show, some are just better photos than what ive posted. the flipper is complete, it has just finished curing today it has been sealed twice so hopefully no water gets in. Ive ordered my last gallon of sliicone and it should arrive this week. So my plans are to add the fins and flipper to the suit then set it in with a silicone skin over the neoprene, this will secure the fins and make it look apart of the suit as well as the flipper. once that has been done the suit will be tried on again to see how flexible my movement is. at this stage i can still bend my legs with ease with the fins down the middle. well i designed it so i could, the base of the fins (that connect to the suit) are thin enough so that they dont cause problems for my legs. as most are aware that the H20 tails do have an extension so they don't really move their knees. while im on the subject, i was going to create an extension for my tail however i feel that i wouldn't have complete control over the flipper. let me explain.. the h20 tails have a rod that connects to a foot plate so when they move their feet the flipper moves as well. I couldn;t create the same effect. however where my feet end in the suit there is a slight gap before the flipper starts so it allows a bit more flexibility but allowing me to have control over my flipper and of course hiding my boney ankles. Hopefully I should be adding my skin to the suit by christmas if everything goes well. ive been doing a test on a scale mold not to fancy but the aim of this what to ensure that it wasn't shallow enough and it would hold the silicone. I will be doing my scales individually then each one will be glued on. how i do my scales will depend on how flexible the suit is once the skin is done. either urethane or silicone. im hoping urethane as this will allow me to keep to the scaley look. At this stage im still deciding on colour schemes ive added a pic but the colour is missing something. thats pretty much what is happening.

    template that I used to create the flipper. i used the butterfly effect I learnt in preschool, the best way to get things Symmetrical

    fin mold close up

    Detailed image of the flipper mold


    A splash of colour, on a test piece

    a scale test, using plaster of paris. the scale was created using thin cardboard. aim of this was to test to see if it was deep enough to hold silicone or urethane.
    Completed flipper, all sides have been sealed twice.
    Last edited by Trident True; 09-04-2016 at 05:15 AM.

    Can someone please get me back to the ocean before I suffocate... I need the water......


  12. #12
    Nice, words cannot even explain how awesome this is going to be

    Sent from my VS840 4G using Tapatalk

    Merman Typhoon!

  13. #13
    Senior Member Undisclosed Pod PearlieMae's Avatar
    Join Date
    Jul 2013
    Posts
    6,661
    Follow PearlieMae On Twitter Add PearlieMae on Facebook
    Hahaha! I hope you didn't change your avatar on my account!

  14. #14
    Senior Member Pod of Oceania Trident True's Avatar
    Join Date
    Apr 2013
    Location
    QLD Australia
    Posts
    382
    Quote Originally Posted by PearlieMae View Post
    Hahaha! I hope you didn't change your avatar on my account!
    haha, yeah i did

    Can someone please get me back to the ocean before I suffocate... I need the water......


  15. #15
    Senior Member Pod of Oceania Trident True's Avatar
    Join Date
    Apr 2013
    Location
    QLD Australia
    Posts
    382
    I've been doing a scale test and my objective was the following. make identical copies of the same thickeness and take the STRESS out of having to roll out MMG to get the right thickness. I DONT THINK SO. im going the easy way. my plan, to create basic shape, recast with MMC, add detail, recast then make several ones using the mold to create my sheet. (note im making my mold like an ice cube tray they wont be overlapped) what do people think, over done of just right? Itsz quiet difficult to come up with a design but i was thinking of handpainting some so i thought this detail would bring out colour quiet well.

    mold of the two, larger and smaller one


    detailed scales
    Last edited by Trident True; 09-04-2016 at 05:15 AM.

    Can someone please get me back to the ocean before I suffocate... I need the water......


  16. #16
    Senior Member Undisclosed Pod PearlieMae's Avatar
    Join Date
    Jul 2013
    Posts
    6,661
    Follow PearlieMae On Twitter Add PearlieMae on Facebook
    I, too, am doing individual scales, but I want some variation among each scale. I have a pasta machine to roll out my clay to a uniform thickness, and I'm using a set of oval cookie cutters to cut uniform-sized disks of clay. For my scale texture, I'm pressing each one across a seashell - scallop, I think - peeling it off and laying it flat. They are pretty thin, and the silicone sets up nicely in the shallow scale mold. I've thinned the top end of each scale as well, so I don't build up a lot of bulk under the overlying row of scales.

    I think we are on to something very different!

  17. #17
    Senior Member Pod of Oceania Trident True's Avatar
    Join Date
    Apr 2013
    Location
    QLD Australia
    Posts
    382
    Scales, scales, scales. ok so this is what ive come up with, im very happy with them. they look better in person, what do you think?
    Last edited by Trident True; 09-04-2016 at 05:16 AM.

    Can someone please get me back to the ocean before I suffocate... I need the water......


  18. #18

    Re: Kyle's H20/Mako mermiads inspired tail with a splash of personality!!!

    Those look really cool!

    Sent from my SPH-D700 using Tapatalk 2
    ~Mermaid Sashika of Yupalean~

  19. #19
    You're doing a great job!
    (Formerly known as Mermaid Claudia)

  20. #20
    Senior Member Pod of Oceania AnnaAbyss's Avatar
    Join Date
    Apr 2012
    Location
    Aireys Inlet, VIC, Australia
    Posts
    452
    Awesome! It's really encouraging to see another Aussie making a silicone tail.

Bookmarks

Posting Permissions

  • You may not post new threads
  • You may not post replies
  • You may not post attachments
  • You may not edit your posts
  •